Woah! It sure was a busy summer here at History Acres. We have spent all summer working on our garden, fighting pests in the apple trees, painting, beating back grape vine and over growth, painting, planting some mulberry trees from a friend, painting, and working on the outside of the house. Oh and did I mention painting. Working until dark almost every night meant that the blog has been sadly neglected.
So, we shall back up to March, when it was still cold. Jeremy and I decided to test out redoing our first floor hardwood floors. We actually have 2 floors on top of one another on the first floor. The original 19th century floor is wide boards and varnished. On top of that another floor was added. We think based on other renovation dates that this happened in the 1910's to replace/cover damage to the floor in the dining room. The wide board floor is missing from the dining room.
 |
Our first view of our hardwood floors that had been covered with carpet for 30+ years!
|
 |
| 19th century floor under the 1910's floor |
Both the wide board and the small board floors are constructed using tongue and groove. When we explored this, we realized that we were not ok with sanding the floors to redo them. Sanding on tongue and groove can remove too much wood and then the tongue and groove can be compromised, especially if previous owners had done the same thing.
Tongue and groove floor in dining room
I spent some time researching and decided to try to chemically strip the floor, instead. We stripped the floor in the smallest room (our living history storage room) with Citristrip, which we left on for several hours to remove large paint splatters and old residues. We then scrubbed the floor with mineral spirits and finally washed in TSP. We let it dry.
 |
| Getting ready to spread the paint stripper |
 |
| The floor cleaned and ready to be stripped |
 |
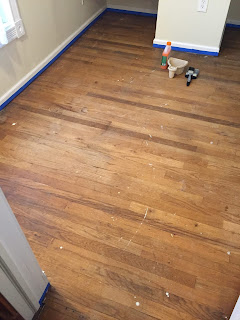
| Floor after stripping, cleaning with mineral spirits, cleaning with TSP |
After drying, we oiled the floor with pure Tung oil. We put 6 coats of Tung oil. 3 each day for 2 days, allowing each layer to dry completely before adding the next. (Note: you have to let the Tung oil cure for several weeks to make sure that it is fully dry before you sit anything on it)
 |
| Floor after a few layers of Tung Oil |
Side note: PPE (personal protective equipment) is always important. So respirator, Tyvek suit, chemical gloves, and goggles were worn.
Once done, we decided not to wax the floor because that room does not get much traffic. The penetrating finish of the Tung oil allows for just adding another layer of Tung oil to freshen up the floor.
So we went from old, worn out, and paint covered..... to warm, clean, and full of life.
 |
| Top left to bottom right: ready to strip, cleaned, first layers of Tung oil, all finished and dry. |


